




Advertisement
D Mills / Byrdie
Curly and wavy hair comes with its own set of concerns–from frizz to definition and wanting to preserve healthy strands. Consistency can be difficult to achieve come wash day. If you have curly or wavy hair, chances are you have tested a wide variety of products and styling methods to bring out the best of your hair texture. The manner in which you dry your hair can have a significant impact on the look–and health–of your curls. Air-drying does not always produce consistent results and a simple blow dry may flatten or frizz your curls.
Using a diffuser can be a game-changer when drying your strands and setting your curl pattern. “A diffuser is most often used to create a ‘Wash n Go’ style,” says curl specialist Ashley Brown, "which is essentially just enhancing and setting your natural curls, coils, and/or waves.” Although a diffuser can be easily added to your blow dryer, its use is not always straightforward. We’ve reached out to hairstylists for the full breakdown on how to use a diffuser. Keep reading for their advice on how wet your hair should be, when you should start scrunching, product application and more.
Meet the Experts
Matthew Collins is a celebrity hairstylist and a Dyson global styling ambassador.
Danjela Nika is a hairstylist and curl specialist based in New York City.
Raphael Rogue is a hairstylist at Rob Peetoom salon in Brooklyn, NY.
Ashley Brown is a curl specialist, a Sam Villa Ambassador and a Mizani artist & texpert.
What Is a Diffuser?
A diffuser is an attachment you add to your hair dryer in order to disperse the air in a controlled manner instead of having it come out of a single concentrated area. It is usually recognized by its bowl shape with multiple prongs. Diffusers help imitate an air-drying effect or a wash-and-go style.
The attachment works by directing airflow all around the curls, which allows them to dry without being disrupted by the very direct stream of air of a regular hair dryer. This has for effect of setting the curls in place and enhancing their nature. “The diffuser is designed to give a gentle cycle of airflow to dry your hair, but not blow it around which will cause frizz,” says Collins.
Benefits of Diffusing
Diffusing helps those with curly or wavy hair minimize drying time, preserve healthy strands and set their curl pattern.
It helps define curls and offers more consistent results than air-drying. “The benefit of using a diffuser is that it will minimize frizz, enhance volume, add shine, and define the curl pattern,” says Rogue. Using a diffuser helps set the curl pattern and promotes shiny strands. “If you let your hair dry naturally it will take some time, so the curl has more of a chance to be disturbed, moved, or shaken up before dried. But once diffused and dry the curl pattern will stay intact much longer and hold its shape frizz-free,” adds Collins.
It minimizes damage provoked by blowdrying. Diffusing is for all hair types as it creates less damage than regular blow-drying, says Nika. It can also help bring out waves or curls that you may not regularly notice. “Contrary to the popular belief that diffusing is just for very curly hair, a diffuser can be used on any hair type or texture,” adds Collins. “In some cases of pin-straight hair it may only add a slight movement, but in most cases, it will amp up your curl pattern by 20 to 70%.”
It can be used to refresh your curls. Diffusing can help give your curls an added boost when you refresh them on the second or third day after wash day, says Brown. Mist your strands with water and a styling spray such as Mizani Style Shifter Society Coco Dew, then start diffusing on a low setting. “You will get a nice refresh for your curls and coils,” she says. “Diffusing the product in will provide added volume.”
Byrdie | Design by Zackary Angeline
How to Choose a Diffuser
Some diffusers are designed to fit over the dryer you already own. Those thinking about diffusing their hair regularly may want to consider investing in a dryer that comes with its own attachment instead. “For most dryers, this aspect can be very tricky as most are not specifically made for the dryer and many dryers do not come with the attachment,” says Collins. Having the air flow of the dryer focused where it needs to be will help prevent unwanted frizz and flyaways. “A quality dryer and diffuser make a world of difference in not only preventing frizz but also in the amount of time it can take to fully dry–it speeds up the dry time,” adds Brown.
Collins recommends the Dyson Supersonic, which comes with its own diffuser that fastens with a high power magnet. Brown suggests using the Sam Villa Pro Light Ionic Blow Dryer and the Deep Bowl Diffuser, designed to fit the dryer.
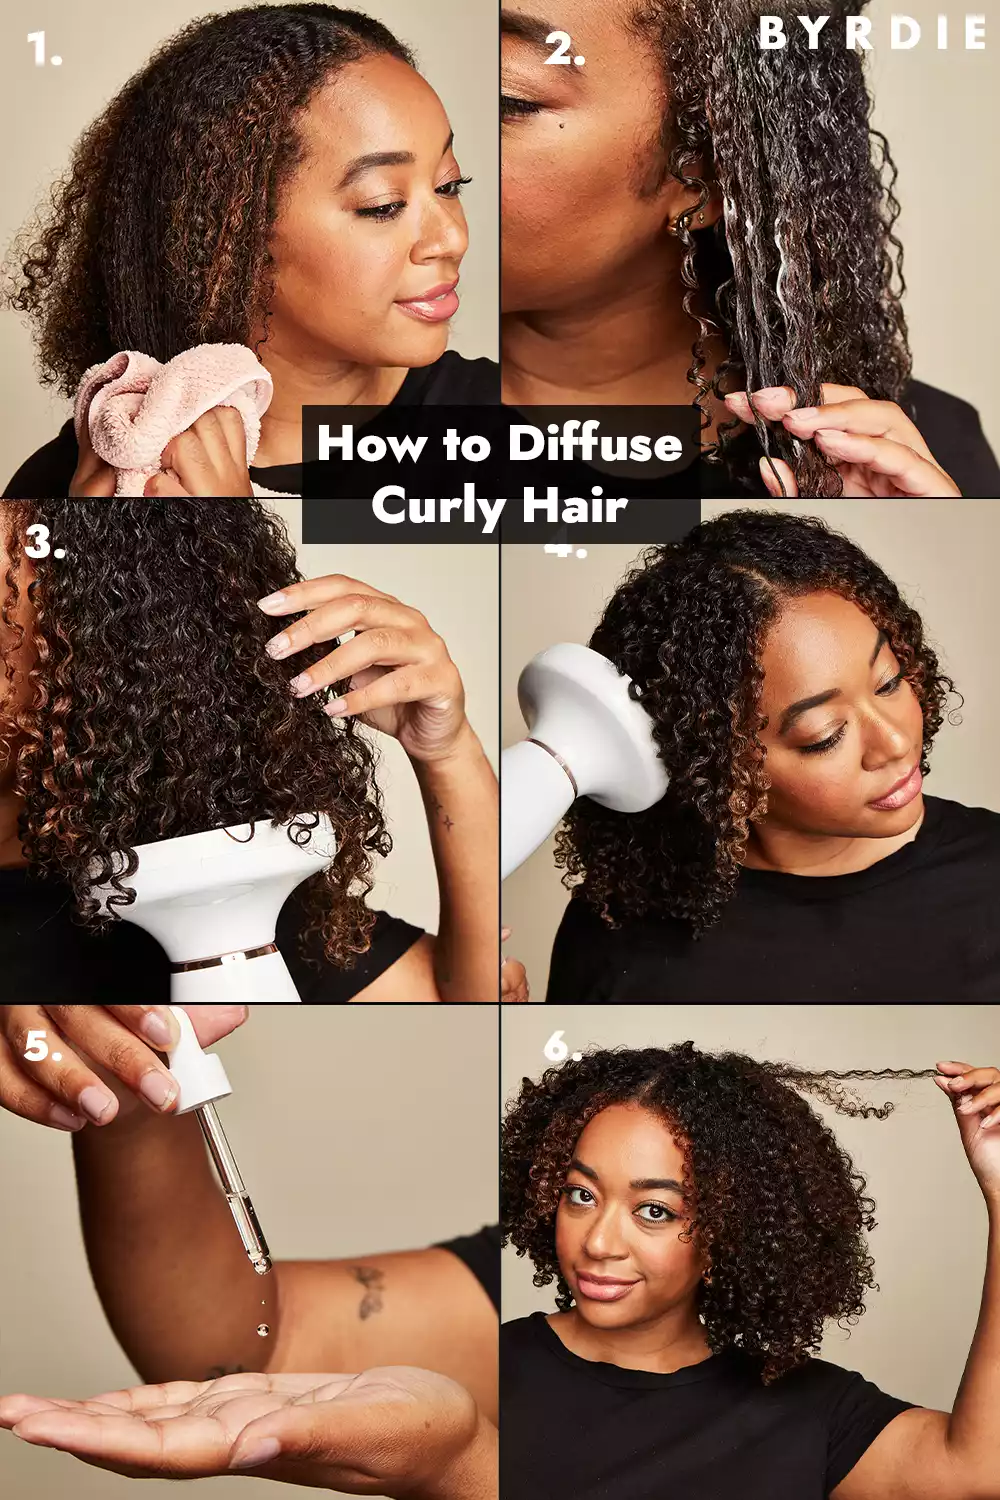
Steps for a Perfect Diffuse
01 of 04
Prepare the Hair for Diffusing
D Mills / Byrdie
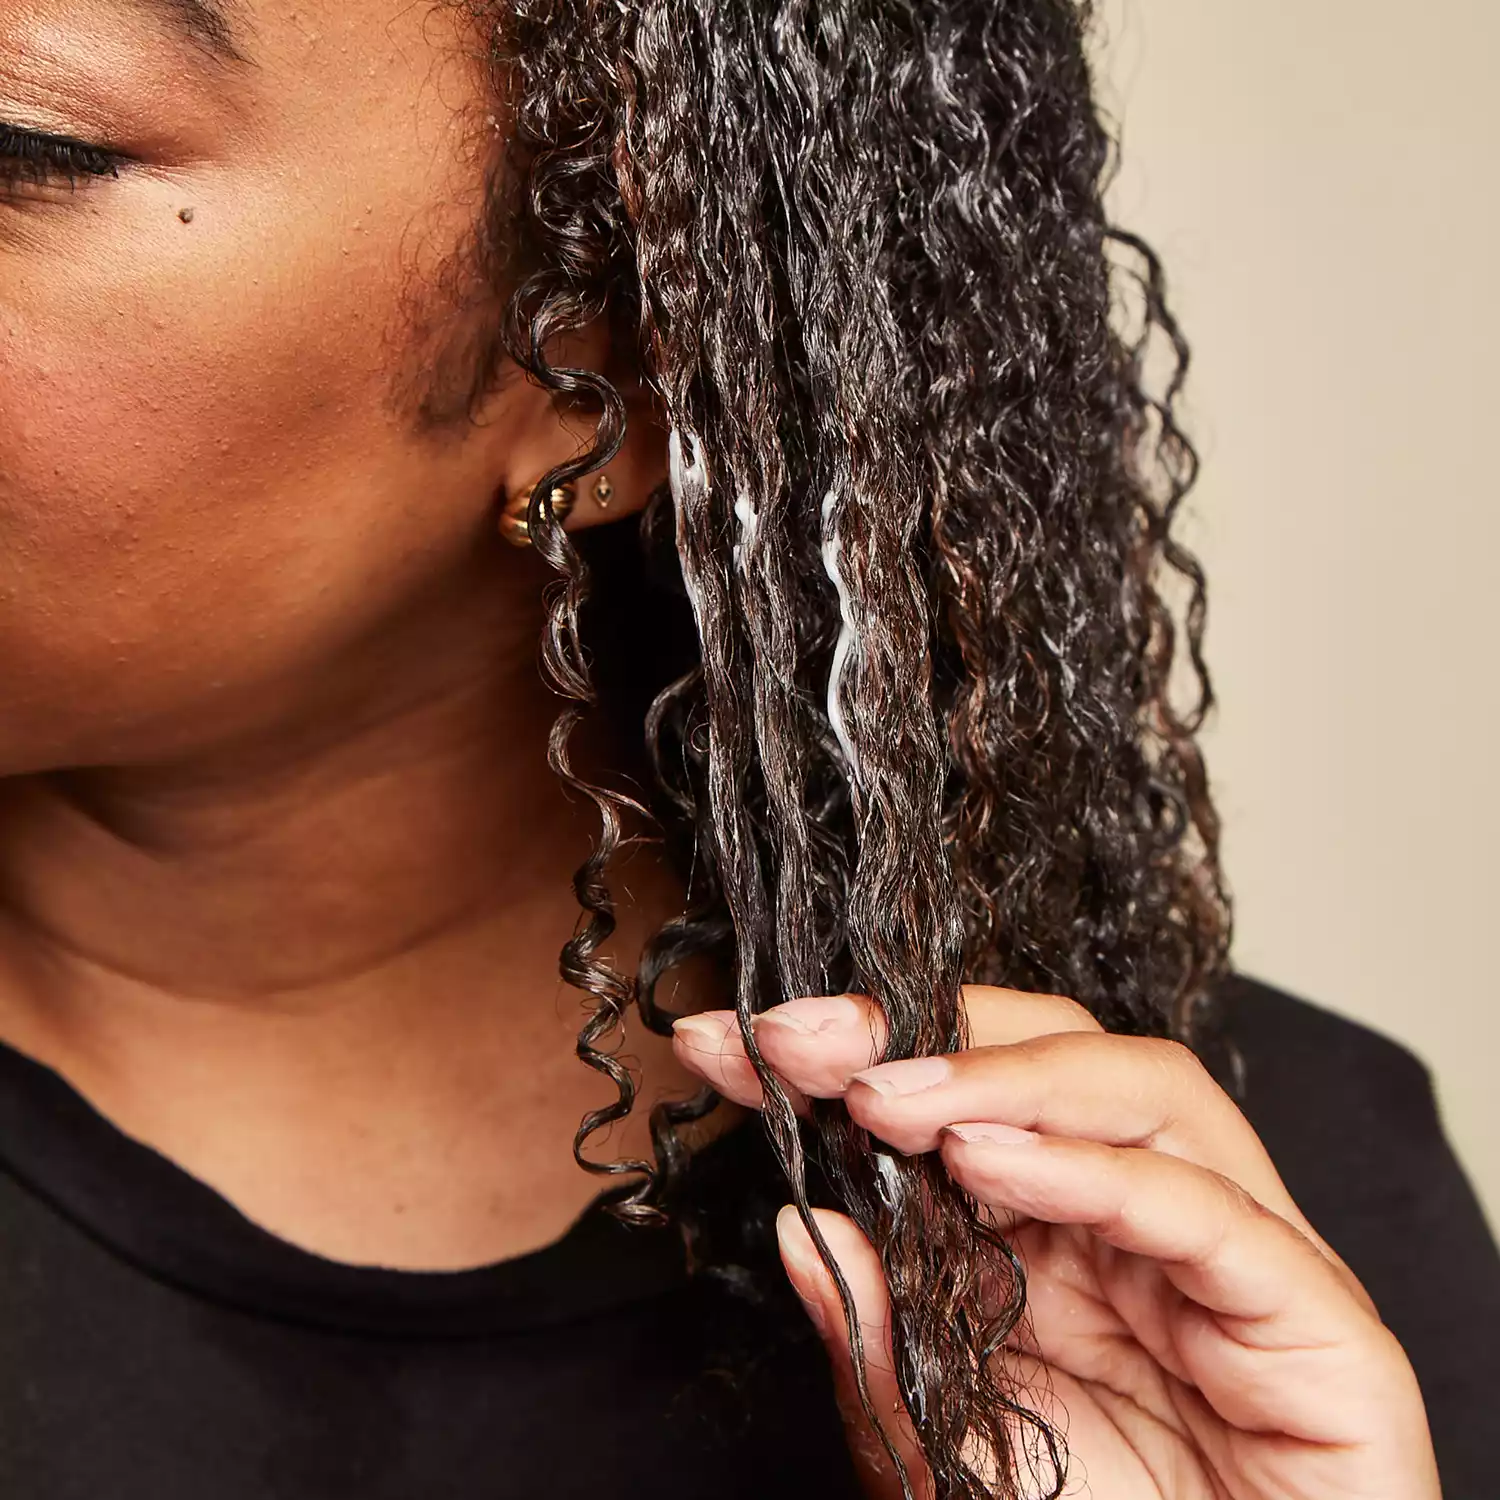
Preparation is an essential step in order achieve the best results when diffusing. “One of these things not being in sync is most often why a guest does not end up with desired results for their ‘wash-n-go’ natural style when using their diffuser,” says Brown.
Start with soaking wet hair. “This helps to distribute your product of choice evenly throughout your entire head of hair,” says Rogue. Make sure your hair remains fully saturated with water by applying product directly after you shower or by misting your strands prior to application.
Use adequate products for your hair texture. Diffusing curly or wavy hair with no product may result in frizz, as opposed to strands prepped with moisturizing and styling products. “For various types of hair, the most important difference to start is your product choice,” says Collins. “If your hair only has a little wave or curl you want to generally focus on polymer-based products like mousses, texture sprays, thickeners or light gels. If your hair has lots of curls and is thick you may want to focus more on emollient types of products like creams or oils.”
Less is more when it comes to styling products. “Clients are very often surprised at the sheer amount of product required, even for fine/less dense hair, to get the desired end result,” says Brown. Even if you have thick hair, you generally need a lower amount of product than you might expect.
Apply hair products from the roots to the ends. Rogue recommends applying your product of choice throughout the hair from the roots to the ends. “Some people like to scrunch it in, and some like to set it with a finger wrap,” he adds. Others will find it limits frizz not to touch their hair until it’s dry. “Each method is appropriate, but it’s all about what works for you.”
Does your hair have to be wet to use a diffuser?
"Your hair does not necessarily have to be wet to use a diffuser," says Brown. However, it is recommended if you are looking to get maximum volume, definition and longevity out of your curls. "Using a diffuser on dry hair will not set the style in the same way that using a diffuser on wet hair will."
02 of 04
Start Diffusing at the Roots
D Mills / Byrdie
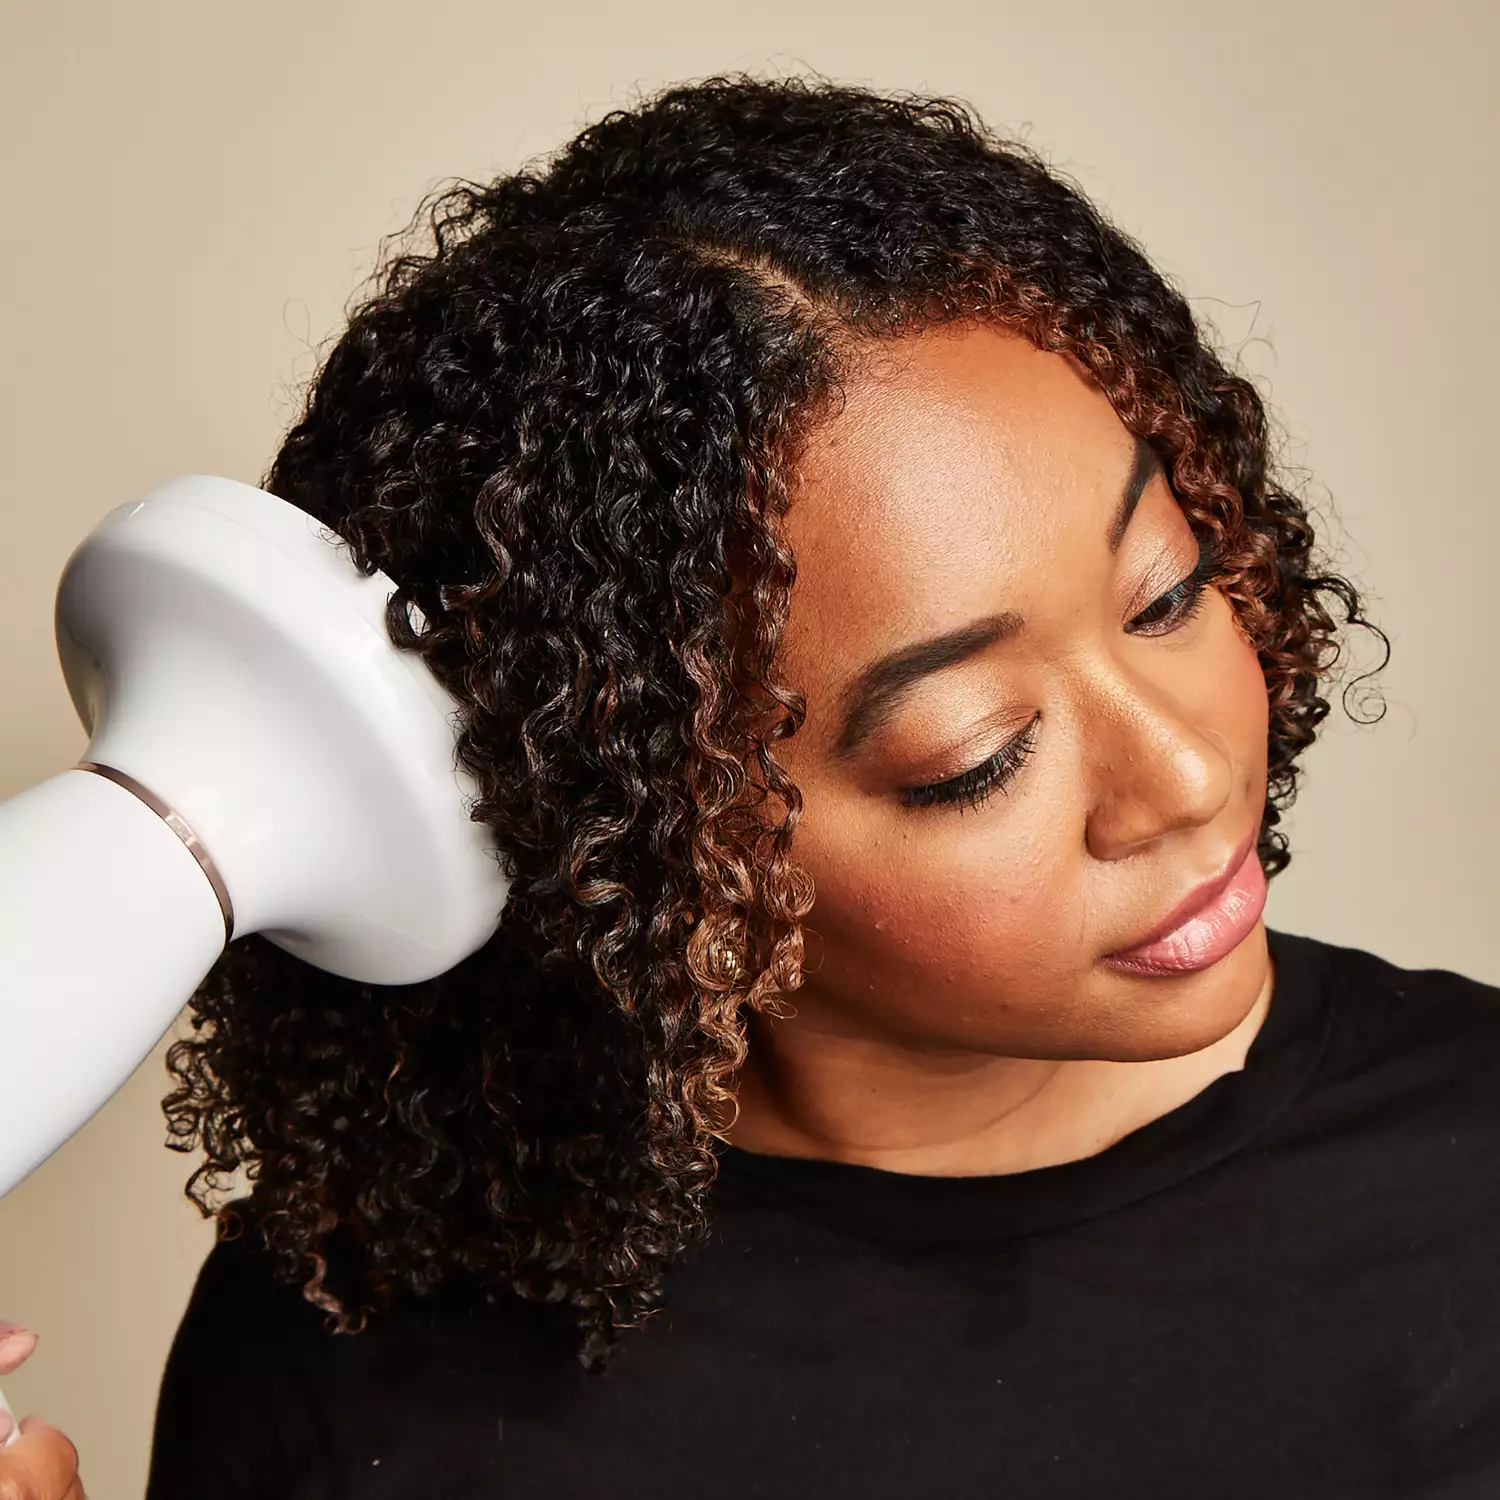
In some cases, the roots may take longer to dry than the rest of the hair. It is why Rogue recommends starting at the top of your head before working down the length. “Once the product and the desired style have been placed, we can begin to diffuse,” he says. Make sure you don’t move the hair while diffusing, move the diffuser instead to limit friction. “When diffusing, it’s best to not disturb the curls, meaning don’t move the hair—just move your diffuser in a 360 degree motion, making sure that you’re hitting all points of your head,” adds Rogue. “Keep in mind that you’re drying your roots first. Once you feel your roots are pretty much dry then you can begin diffusing down the mid-shaft, toward the ends of the hair.” Nika recommends leaning forward and flipping your hair in front of you. “Lightly shake your head to have the curls fall into place. While the back dries, any product that falls toward the front of the hair helps reduce the frizz in the front,” she says.
Expert Tip
If you are looking to reduce frizz, both Collins and Nika recommend setting your dryer on a high heat and low airflow setting. When using the Dyson Supersonic hair dryer, Collins suggests using low or medium power and medium to high heat.
03 of 04
Start Building Volume and Diffuse the Length
D Mills / Byrdie
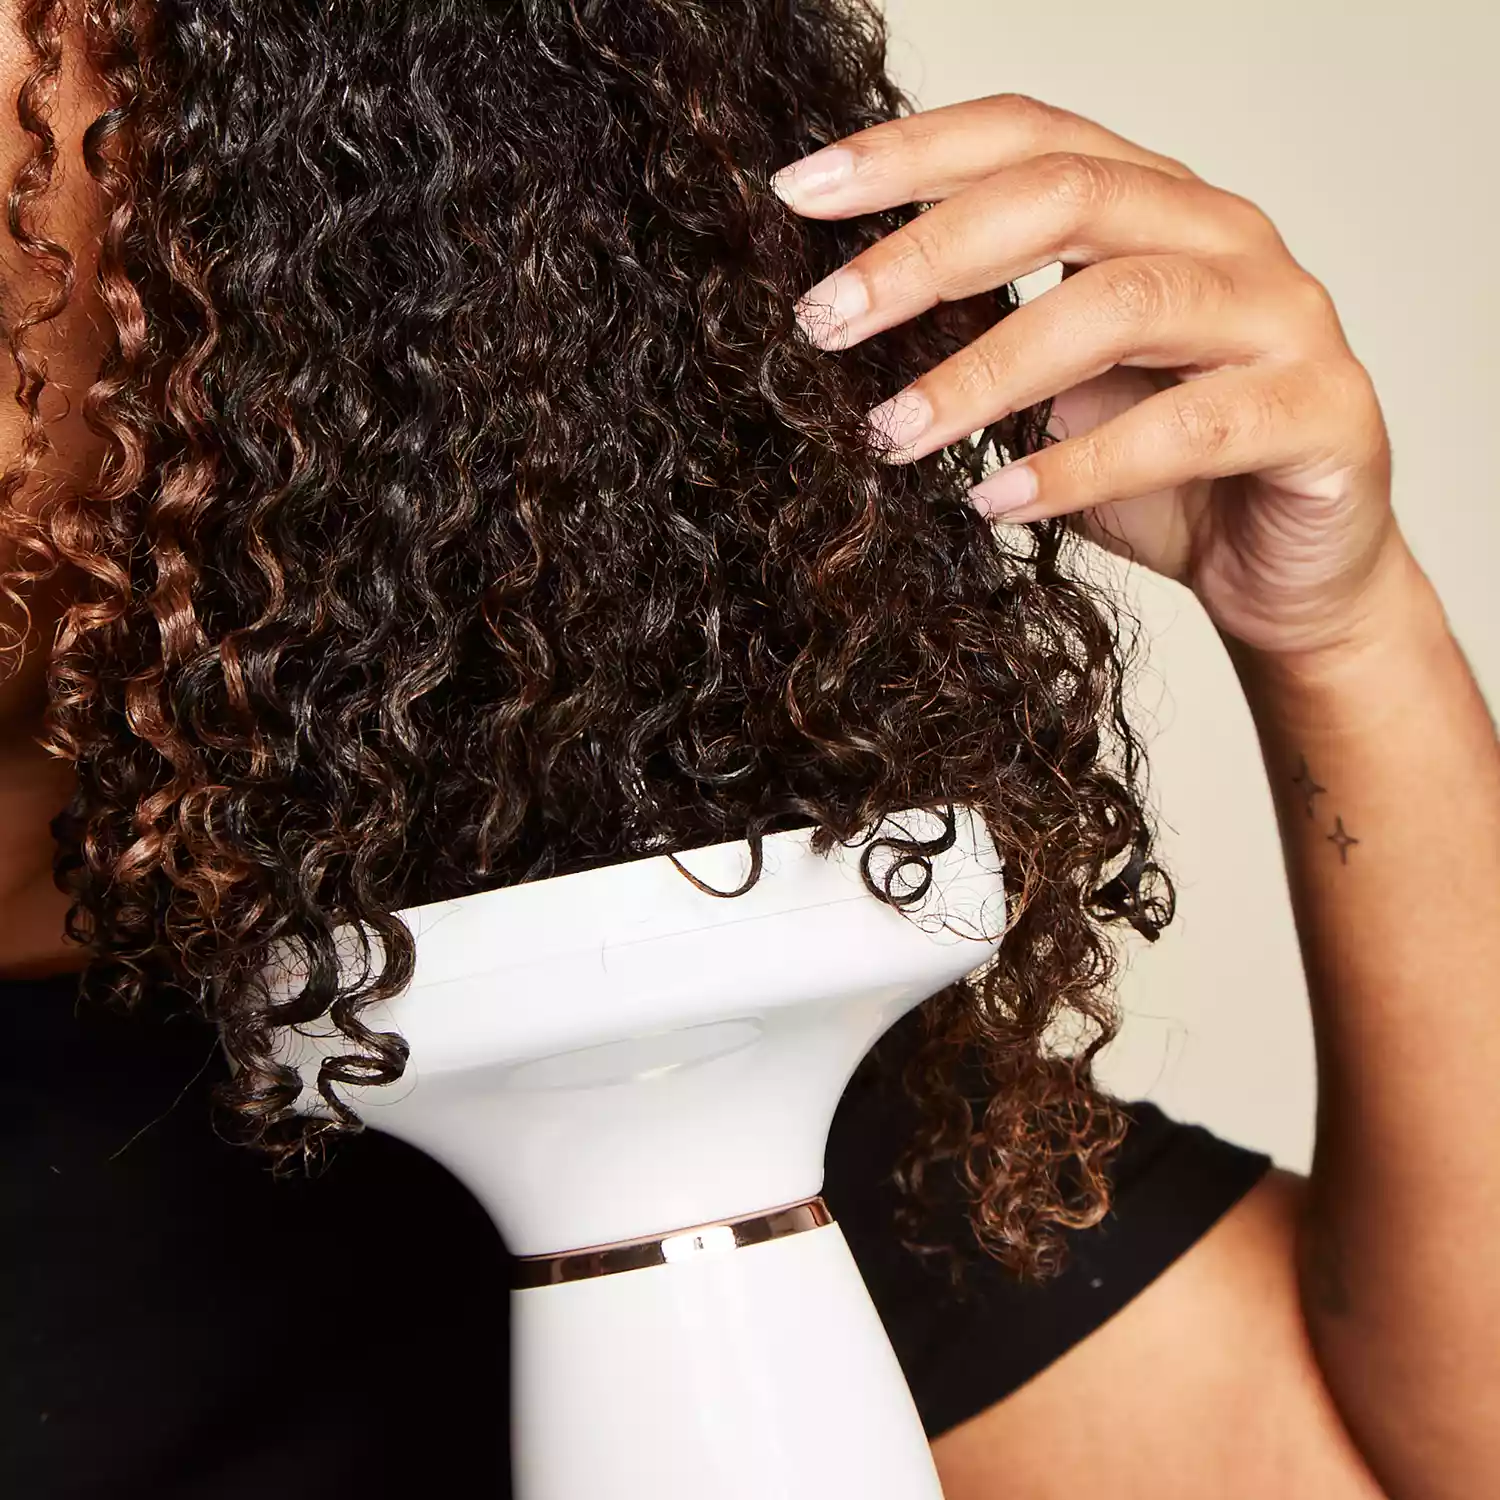
Once the roots are dry, you can control how much volume you create by the angle in which you diffuse your hair in. You can flip your hair and diffuse it in various positions for added volume, or choose to diffusing it while sitting up.
Start shaking out your hair. “Once you feel that things are starting to feel a little bit drier, you’ll notice the hair starting to get fuller,” says Rogue. “This is when you can start doing the shake-out motion. The shake-out is when you flip your head over and really get in there with your diffuser and start shaking out your hair. This is going to start promoting volume from underneath the nape of the neck.”
Cup your hair in the diffuser. Once the midsection of the hair is fully dry, flip your hair back upright and keep diffusing. This is when you’ll want to start cupping your hair into the diffuser and move your hair in an upward motion while tilting the head from side to side. Make sure you ends dry last to avoid frizz.
You will know your curls are dry when the styling product applied prior has formed a cast over your strands. It may make your hair slightly crunchy to the touch (more on that below).
Expert tip
Nika recommends keeping the diffuser three to five inches away from the head and moving the dryer in a circular motion around the targeted area without touching your hair.
04 of 04
Scrunch and Set Your Curls
D Mills / Byrdie
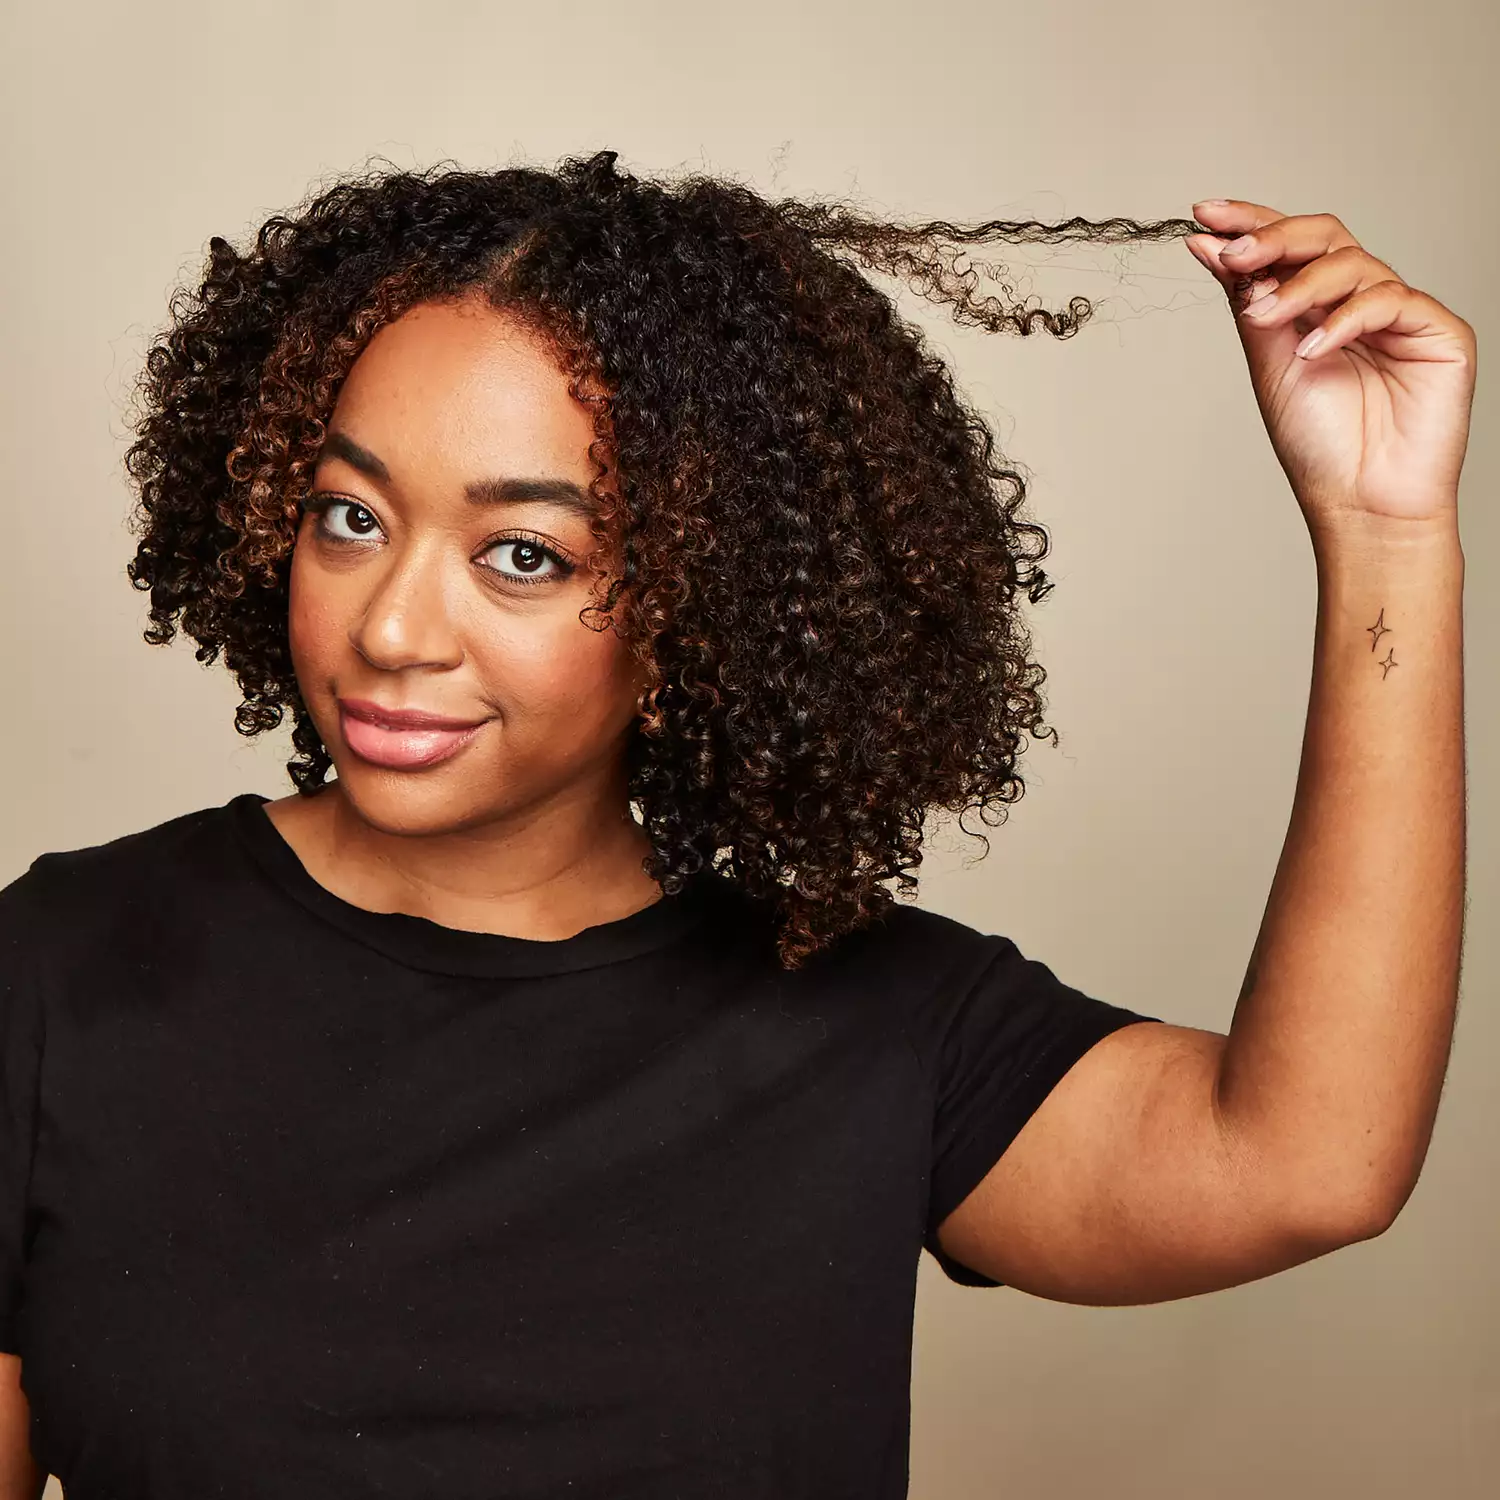
For best results, Brown recommends diffusing the hair until it is 85 to 90% dry before touching it. “This also helps to prevent unwanted frizz and helps to ensure longevity of the style,” she says. Once the hair has fully dried, this is when you can start scrunching to break the cast and set your curls. Start by shaking your head to loosen your roots and start scrunching your hair. According to Nika, the best way to scrunch is by opening your palms and holding the hair, bringing the ends towards the root. Squeeze the entire length of the hair at the root to break the cast. Personalize your curl placement as a final step. “Once these steps are completed, this is where the fun part starts. You can now really personalize your curl placement depending on how you like to have them lay,” says Rogue. “I sometimes like to go in again and spray some light-hold hairspray; it just helps to add extra definition to the curls and lock in the style.”
Advertisement
Advertisement


Advertisement
Advertisement


